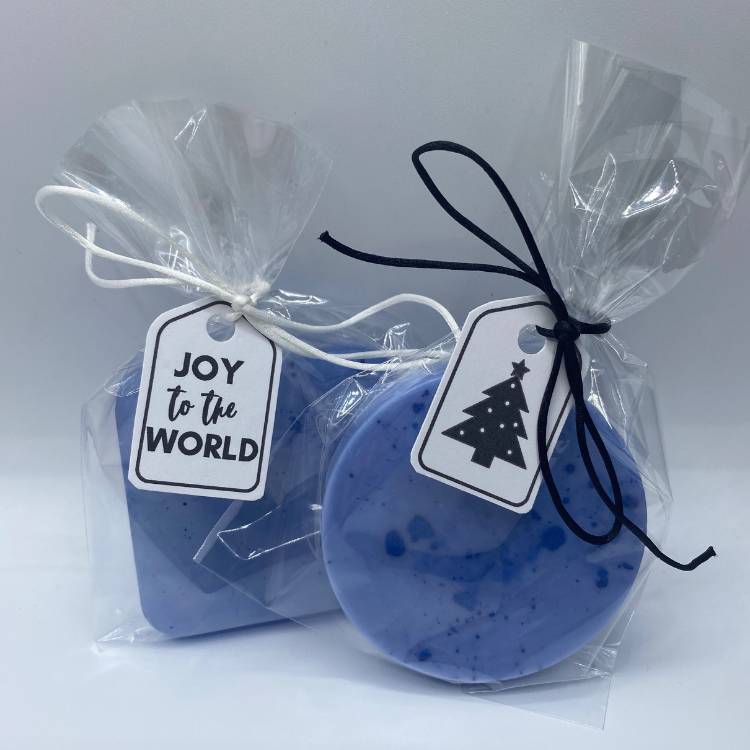
DIY Peppermint Soap Bars
Are you looking for a festive and refreshing soap bar recipe? These DIY peppermint soap bars are perfect for the holiday season! Made with essential oils and melt-and-pour soap, they’ll leave your skin feeling refreshed and invigorated. Plus, they make a great homemade gift idea! Keep reading to learn how to make these delightful peppermint soap bars.
This post may contain affiliate links. That means that if you click on a link and purchase something I recommend, I will receive a small commission at no extra cost to you. As an Amazon Associate, I earn from qualifying purchases. This helps keep my website up and running and is very appreciated. Thank you for your support! You can read my full disclosure policy here.
What do you Need to Make DIY Peppermint Soap Bars:
Most of the ingredients used to make these DIY peppermint soap bars can be found online. As an Amazon Prime member, I take advantage of my free next-day delivery on all orders, making Amazon my store of choice. For those who usually use Amazon, I have included text links to my preferred option
400g Melt & pour soap, I used a mixture of this Shea butter soap and clear glycerin soap.
Soap colourant, you can use whichever colours you wish, but for mine, I used this blue mica powder.
Peppermint Essential oil or any other preferred fragrance.
Silicone moulds, I love these snowflake silicone moulds, but you can use whatever shape you prefer.
Double boiler or equivalent. I use a heatproof plastic jug placed in a saucepan of water. You can also use a microwavable dish and melt the soap in the microwave if you prefer.
Rubbing alcohol helps the soap stick together and eliminate bubbles.
Sharp knife to cut up the soap block.

How to Make Peppermint Swirl Soap Bars:
This recipe and instructions below are enough to make around six peppermint soap bars, depending on the size of the moulds used.
- Start by cutting up the soap into 1-2 cm chunks.
- Melt the soap either using the double boiler technique or by heating it in a microwave. If using a microwave, ensure you only heat in short 30-second bursts and stir between intervals.
- Once the soap has melted, add the colourant and fragrance and mix well.
- Carefully pour the melted soap into the mould, spray with rubbing alcohol to remove any bubbles, and leave to cool for a few hours.
- Gently remove soap from moulds.
How to Store Homemade Soap
Melt-and-pour soap contains glycerin, which acts as a great moisturiser for the skin. However, if not stored correctly, it can start to sweat. The best way to store melt-and-pour soap is to wrap it immediately after de-moulding in cling film and store it in a cool, dry place until ready to use.
Giving Homemade Soap as Gifts


These homemade peppermint soap bars also make great DIY gifts. Just wrap it in a clear plastic bag, tie with some fancy ribbon and add a gift tag. I used these lovely free Christmas-inspired downloadable gift tags from Paisley & Sparrow
If you prefer to make your gift tags, I recommend using Avery Design & Print. You can design all your gift tags or labels with their free templates and software. You can then print them on your home printer.
Final Thoughts
These DIY peppermint soap bars are the perfect way to get into the festive spirit! Made with simple ingredients, they are quick and easy to make. Plus, they make a great homemade gift idea for friends and family.
Remember to check out our related resources. We have many other helpful tips, gift ideas, and delicious treats to make your Christmas celebrations extra special.
Thanks so much for stopping by; I appreciate everyone who takes the time to read and make it to the end! I have lots of exciting new content in the next few weeks, so make sure you pop back to catch up!


