A Beginner Guide to DIY Shower Melts!
Discover the ultimate beginner’s guide to crafting DIY shower melts! From essential oil blends to step-by-step instructions, learn how to create aromatic shower companions for a spa-like experience at home.
This post may contain affiliate links. That means if you click on a link and purchase something I recommend, I will receive a small commission at no extra cost. As an Amazon Associate, I earn from qualifying purchases. This helps keep my website up and running and is very appreciated. Thank you for your support! You can read my full disclosure policy here.
What are Shower Melts
Shower melts, steamers and bombs are bath products that transform your shower experience into a therapeutic and aromatic escape. Unlike bath bombs, which are primarily used in bathtubs, shower melts are uniquely crafted to release essential oils and fragrances when they come into contact with water and steam in the shower. This distinct feature makes them a perfect choice for individuals who prefer showers over baths but still seek the benefits of aromatherapy.
One of the primary benefits of using shower melts is their ability to infuse your shower with therapeutic scents, providing an easy and effective way to enjoy aromatherapy. Essential oils such as eucalyptus, lavender, and peppermint, known for their calming properties, are commonly used in shower melts. They promote relaxation, alleviate stress, and invigorate the senses. Additionally, they can enhance respiratory function, improve mood, and create a spa-like atmosphere within the comfort of your own home.
Shower melts come in various forms and compositions, often incorporating natural ingredients such as baking soda, citric acid, and essential oils. Some may also include botanicals and colourants to enhance their visual appeal and overall experience. These ingredients contribute to the soothing scents and ensure that the shower melts dissolve efficiently in the steamy environment, releasing their beneficial properties.
DIY Shower Melts: Recipes and Tips
Creating your own shower melts at home can be a fun and cost-effective way to elevate your shower experience. Below, you will find recipes for two of my favourite shower melts and tips on customising them to suit your preferences.
What You Need to Make Basic Shower Melts
Baking Soda – also known as sodium bicarbonate, is a versatile compound commonly used in baking, cleaning, and personal care products. When it comes to shower melts, baking soda plays several important roles, such as
- Structure: Baking soda is a primary ingredient that provides the solid base for the shower melts. It helps create a firm yet crumbly texture that dissolves slowly when exposed to water.
- Fizzy Reaction: Combined with citric acid, baking soda helps produce a fizzy reaction when the shower melt comes into contact with water. This reaction releases the essential oils and other aromatic compounds into the steam of the shower, creating a spa-like experience.
Citric Acid – This is a naturally occurring organic acid found in citrus fruits such as lemons, limes, and oranges. When combined with baking soda (sodium bicarbonate) and exposed to water, citric acid undergoes a chemical reaction that produces carbon dioxide gas. This reaction creates the characteristic fizzing effect of shower melts, helping to disperse the essential oils and fragrances into the shower’s steam.
Corn Starch – Also known as cornflour in some countries, it’s a fine, powdery substance derived from corn kernels. Corn starch acts as a binding agent that helps hold the ingredients of the shower melt together. It stabilises the mixture, ensuring the shower melts, maintains its shape and doesn’t crumble.
Water – Water helps bind all the ingredients together. You can use ordinary tap water, but I recommend using boiled, cooled water. (Tip: Using a spritz bottle rather than a teaspoon will reduce the amount of premature fizzing when mixing the ingredients.)
Essential Oils – Essential oils influence mood and well-being through their scents. For example, lavender essential oil is calming and can help reduce stress, while peppermint oil is refreshing and can boost energy. Incorporating essential oils into shower melts allows you to create a spa-like experience that promotes relaxation, revitalisation, or other desired effects depending on the oils used.
Mixing Bowl & Spoon – Any style will do, but I recommend keeping them separate from those you use for food preparation.
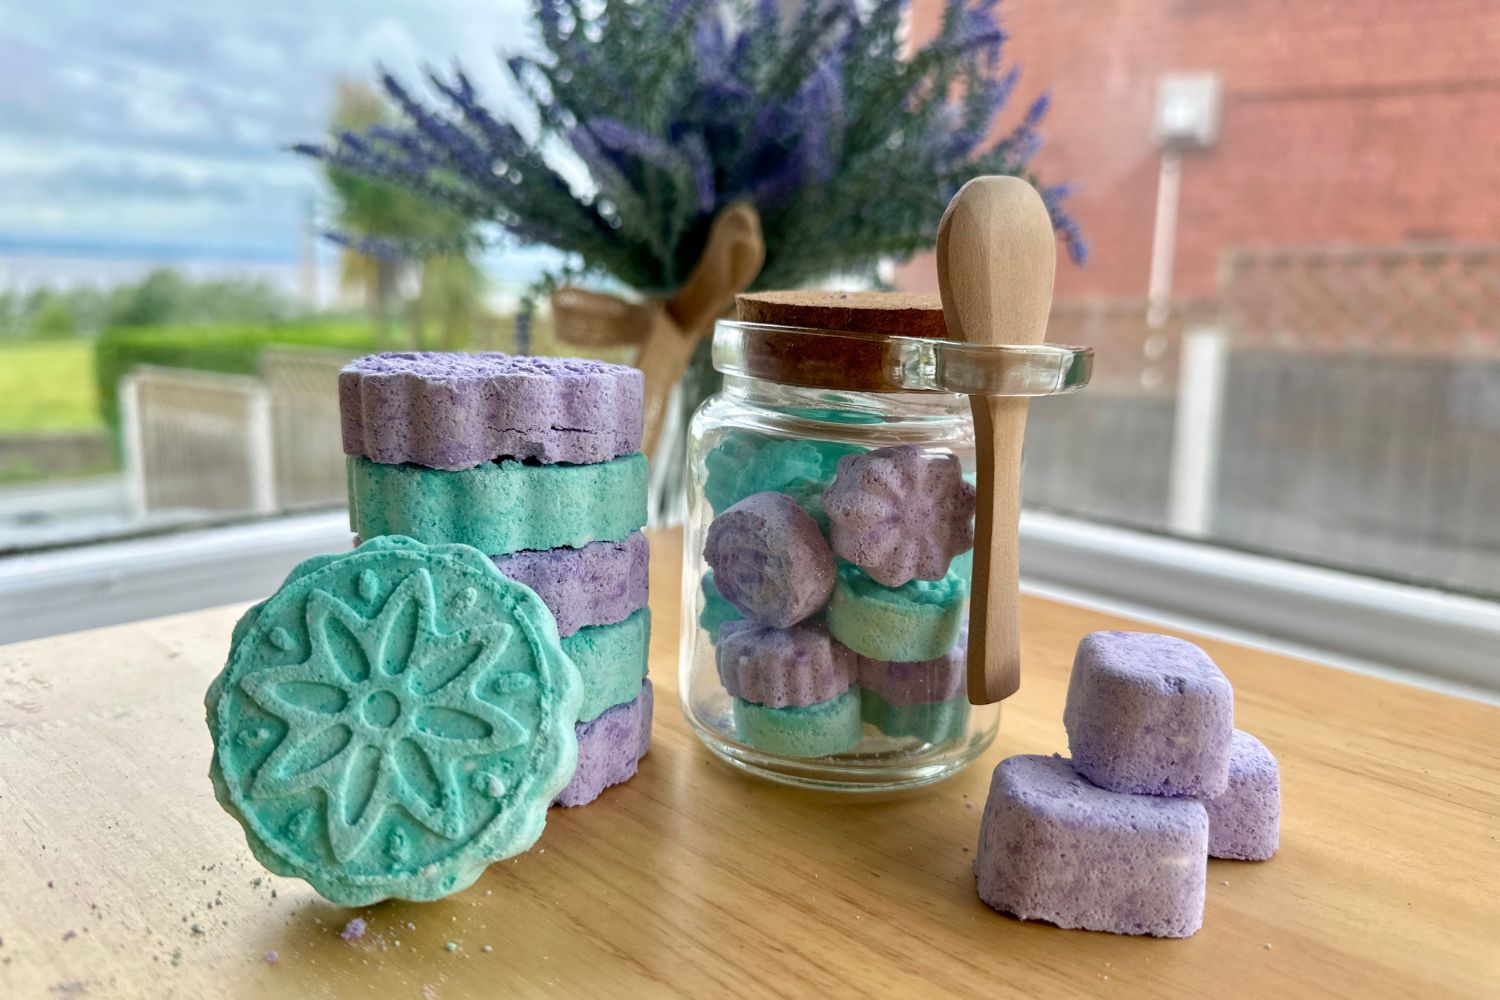
Silicone moulds – The choice of moulds can significantly impact the final result when making shower melts. My favourite moulds are silicone candy or soap moulds like these cute flower moulds from Amazon. They are flexible, non-stick, and easy to clean, making removing the melts without damaging them simple. Silicone moulds come in various shapes and sizes, from basic geometric shapes like circles and squares to more intricate designs like flowers, hearts, and stars. Their flexibility lets you easily pop out the shower melts once they have hardened. However, you can also use a standard ice cube tray
Basic Eucalyptus and Peppermint Shower Melts
Ingredients:
- 1 cup baking soda
- 1/2 cup citric acid
- 1/2 cup cornstarch
- 2-3 tablespoons water
- 15 drops of eucalyptus essential oil
- 10 drops peppermint essential oil
- Optional: natural colourants
Instructions:
- Combine the baking soda, citric acid, and cornstarch in a large mixing bowl.
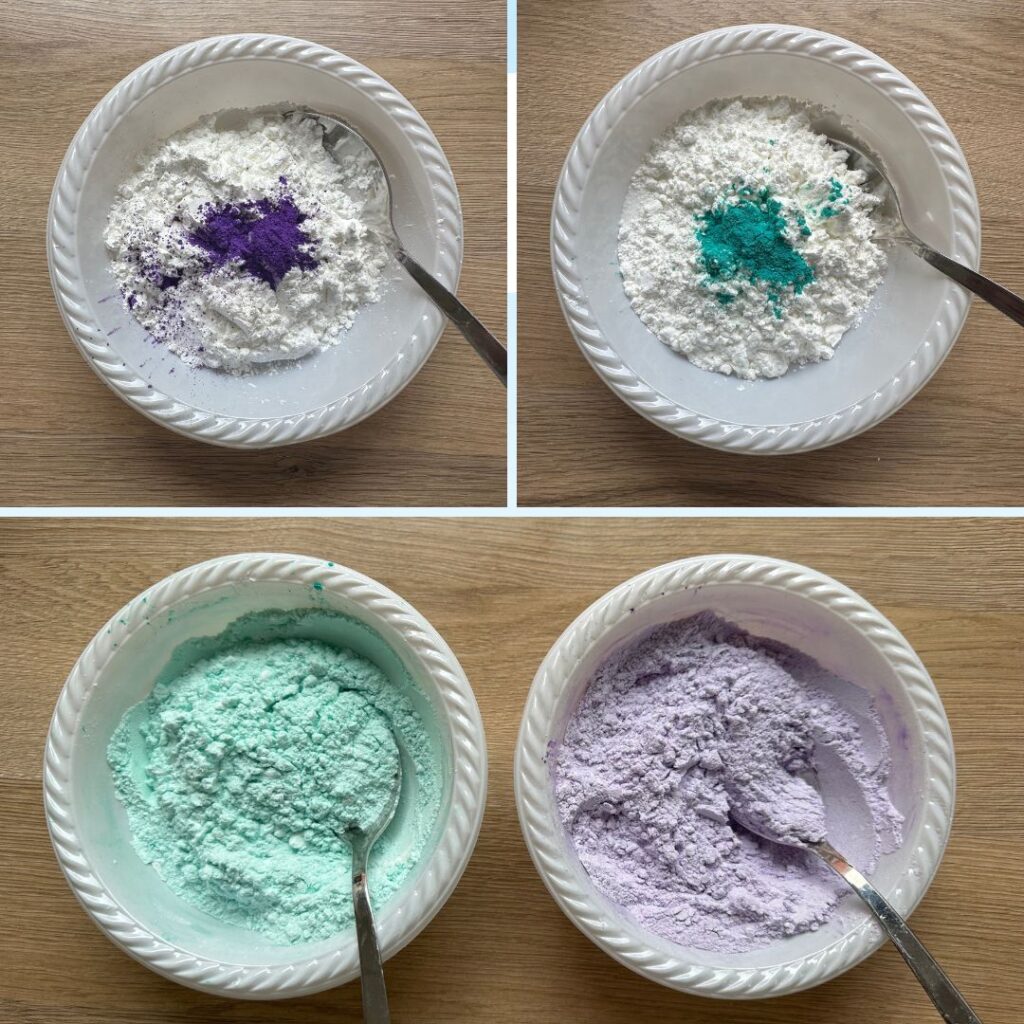
- Slowly add water until the mixture resembles wet sand.
- Add 10 drops each of eucalyptus and peppermint essential oils, mixing thoroughly.
- If using natural colourants, add them now and mix well.
- Press the mixture firmly into silicone moulds and let them dry for 24 hours.
- Once dry, remove the shower melts from the moulds and store them in an airtight container.
Lavender and Chamomile Shower Melts
Ingredients:
- 1 cup baking soda
- 1/2 cup citric acid
- 1/2 cup cornstarch
- 2-3 tablespoons water
- 10 drops of lavender essential oil
- 10 drops of chamomile essential oil
- Optional: dried lavender buds
Instructions:
- Mix the baking soda, citric acid, and cornstarch in a bowl.
- Gradually add water until the mixture has a wet sand-like consistency.
- Stir in the lavender and chamomile essential oils.
- For an added touch, sprinkle dried lavender buds into the moulds before pressing in the mixture.
- Pack the mixture into silicone moulds and allow them to dry for 24 hours.
- Remove the solidified shower melts from the moulds and store them in an airtight container.


Customising Your Shower Melts
Consider experimenting with different essential oils to tailor these recipes to your preferences. This customisation aspect of DIY shower melts allows you to create a unique and personalised shower experience. Citrus oils like orange and lemon can create invigorating and refreshing shower melts, while oils like ylang-ylang and sandalwood can provide a more relaxing experience. Natural colourants such as beet powder or turmeric can also be added to give your shower melts a unique appearance. If you need some inspiration, check out these 10 easy-to-make shower melt recipes.
Safety Tips
Using essential oils in shower melts can enhance your shower experience with aromatherapy benefits, but handling and using them safely is vital. Here are some safety tips to keep in mind:
Dilute Properly: Ensure essential oils are properly diluted in the shower melt mixture to avoid skin irritation. Use appropriate carriers like baking soda, citric acid, corn starch, or other ingredients that can help disperse the oils evenly.
Avoid Sensitive Areas: When using shower melts, ensure they are placed in a way that avoids direct contact with sensitive areas such as the eyes, mucous membranes, and broken skin. Place them on the shower floor where water can dissolve them slowly and release the aroma.
Use Safe Concentrations: Do not exceed the recommended concentrations of essential oils in your shower melts. Generally, 10-20 drops of essential oil per batch of shower melts are sufficient, depending on the size of the batch and the specific oils used.
Proper Storage: To preserve the integrity of the essential oils, store your shower melts in a cool, dry place away from direct sunlight and heat. Ensure they are kept out of the reach of children and pets.
Avoid Ingestion: Shower melts are for external use only. Ensure they are clearly labelled and stored to prevent accidental ingestion by children or pets.
Use in a Well-Ventilated Area: Although shower melts are used in the shower, ensure the bathroom is well-ventilated. Some essential oils can be potent, and a well-ventilated space can help prevent overpowering scents or respiratory irritation.
Consult a Professional: If you are pregnant, nursing, have a medical condition or are using shower melts for children, consult a healthcare professional or a certified aromatherapist before use to ensure the oils chosen are safe for your specific situation.
Maximising Your Shower Melt Experience
Proper storage and usage are absolutely essential when it comes to shower melts. To preserve their fragrance and effectiveness, store your shower melts in a cool, dry place, ideally in an airtight container.
Exposure to moisture can prematurely activate the melts, diminishing their potency. Therefore, it’s crucial to keep them away from direct sources of water until you’re ready to use them.
When using a shower melt, place it on the shower floor but outside the direct stream of water. This ensures a slow and steady release of its aromatic properties, allowing you to savour the experience.
Below are some frequently asked questions about shower melts:
Q: How long does a shower melt last?
A: Typically, a shower melt lasts for one shower session, approximately 5-10 minutes, depending on the water flow and placement.
Q: Are shower melts safe for all skin types?
A: Most shower melts are formulated to be safe for all skin types, but it’s always advisable to check the ingredient list if you have sensitive skin or allergies.
Q: Can I use shower melts in a bath? A: While designed for showers, they can be used in baths, though they may dissolve more quickly. For a prolonged experience, consider using bath bombs instead.
Final thoughts
Making basic DIY shower melts is a fun and easy way to enhance your shower experience. By following the simple steps outlined in this guide, you can create your own personalised shower melts with your favourite scents and ingredients. So why not give it a try and transform your shower routine into a spa-like indulgence? Don’t forget to check out our related resources for more inspiration and ideas.
Thanks so much for stopping by; I appreciate everyone who takes the time to read and make it to the end! I have lots of exciting new content in the next few weeks, so make sure you pop back to catch up!


